How to Deal with 4K RTSP Streams in Python: Stable OpenCV + GStreamer Pipeline
Handle high-resolution IP camera streams without lag or CPU overload. Learn why pip OpenCV chokes on 4K RTSP, how FFmpeg fits in, and build a zero-latency pipeline with GStreamer, NVDEC, and a dual-stream grab/retrieve architecture.
Special thanks to Kenan Can for his excellent article on building OpenCV with GStreamer on Windows—endless thanks for the inspiration and the roadmap. Thanks also to Muharrem Aytekin for his help and support along the way.
If you are building an industrial Computer Vision application (like manufacturing quality control or autonomous tracking) using high-end GPUs like an NVIDIA Datacenter GPU or RTX 4090, you will inevitably work with high-resolution IP cameras. Today, 4K and 12MP (4000x3000) sensors are the standard.
However, if you install opencv-python via pip and pass an RTSP URL to cv2.VideoCapture(), you will face a catastrophic system failure. The video will lag minutes behind real-time, your GUI will freeze, memory will leak, and your CPU will hit 100% while your expensive GPU sits idle.
In this guide, we will break down the exact mechanics behind this bottleneck—starting from how video codecs work—and build a zero-latency, hardware-accelerated architecture using OpenCV, GStreamer, and the Dual-Stream concept.
1. The Core Problem: Understanding Video Codecs (H.264 & H.265)
Before we fix the pipeline, we must understand what an RTSP stream actually is. An IP camera does not send "pictures" over the network; that would instantly crash any local network.
Let's look at the raw data of a 12 Megapixel camera streaming at 25 Frames Per Second (FPS):
- Resolution: 4000 x 3000 pixels = 12,000,000 pixels per frame.
- Color Channels: 3 channels (BGR).
- Data per Frame: 12,000,000 x 3 bytes = 36 Megabytes per frame.
- Uncompressed Data Rate: 36 MB x 25 FPS = 900 Megabytes per second!
You can prove these numbers directly from a live RTSP stream by reading one frame and the stream's reported FPS:
import cv2

# Replace with your camera's RTSP URL (main stream for 12MP, or sub for 720p)
RTSP_URL = "rtsp://user:password@10.0.0.1:554/ch1/main"

cap = cv2.VideoCapture(RTSP_URL)
ret, frame = cap.read()
if not ret:
    print("Failed to read from stream. Check URL and network.")
else:
    h, w = frame.shape[:2]
    channels = frame.shape[2] if len(frame.shape) == 3 else 1
    pixels = w * h
    bytes_per_frame = frame.nbytes
    fps = cap.get(cv2.CAP_PROP_FPS) or 25.0
    mb_per_frame = bytes_per_frame / (1000 * 1000)
    mb_per_sec = mb_per_frame * fps

    print(f"Resolution:           {w} x {h} = {pixels:,} pixels per frame")
    print(f"Color channels:       {channels} (BGR)")
    print(f"Data per frame:       {pixels:,} x {channels} bytes = {bytes_per_frame:,} bytes = {mb_per_frame:.2f} MB")
    print(f"Reported FPS:         {fps}")
    print(f"Uncompressed rate:    {mb_per_frame:.2f} MB x {fps:.0f} FPS = {mb_per_sec:.0f} MB/s")
cap.release()
Run the script with your camera's RTSP URL; the output shows the raw data rate your CPU or GPU must handle when decoding the stream.
You can also measure the compressed bitrate (what actually goes over the network) by capturing one second of stream with FFmpeg and checking the file size:
ffmpeg -y -rtsp_transport tcp -i "rtsp://user:password@10.0.0.1:554/ch1/main" -t 1 -c copy -f mpegts one_second.ts
ls -lh one_second.ts
For a 4000×3000 H.265 stream at 22 FPS, the file is typically around 1.79 MB for that one second—i.e. ~1.79 MB/s compressed on the wire. In Python, one decoded frame is 34.33 MiB (4000×3000×3 BGR). At 22 frames per second that is ~755 MB/s of raw pixel data. So the decoded stream is about 400× larger than the compressed stream (755 ÷ 1.79 ≈ 422×). The camera sends only 1.79 MB/s; the decoder must output hundreds of MB/s. That gap is why decoding is so costly.
To transmit this over a standard Gigabit ethernet cable, cameras use heavy compression codecs, primarily H.264 (Advanced Video Coding) and H.265 (High Efficiency Video Coding - HEVC).
These codecs work by sending one full frame (I-Frame) and then only sending the mathematical differences (vectors and motion predictions) for the subsequent frames (P-Frames and B-Frames). H.265 is a marvel of engineering—it compresses video up to 50% more efficiently than H.264. However, this massive compression comes at a steep computational cost. Reconstructing a full 12MP image from complex H.265 mathematical vectors requires immense processing power.
2. Software Decoding (FFmpeg) vs. Hardware Decoding (NVDEC)
What is FFmpeg?
FFmpeg is the undisputed "Swiss Army Knife" of multimedia handling. It is a massive, open-source suite of libraries used to record, convert, and stream audio and video. Under the hood, when you call cv2.VideoCapture() in OpenCV, it silently uses FFmpeg as its default backend engine to read and decode the video stream.
While FFmpeg is incredibly powerful, there is a catch: The pre-compiled opencv-python packages you install via pip are designed for universal compatibility across all operating systems and hardware. To ensure it runs on a cheap laptop just as well as a server, the default FFmpeg in OpenCV is compiled for CPU-only Software Decoding.
Does FFmpeg Use GPU Decoding?
Standalone FFmpeg (the command-line tool or the libraries when built yourself) can use GPU decoding. On NVIDIA you enable it with hardware acceleration flags, for example:
- H.264:
-hwaccel cuda -hwaccel_output_format cuda -c:v h264_cuvid(decode on NVDEC) - H.265:
-hwaccel cuda -hwaccel_output_format cuda -c:v hevc_cuvid
So yes—FFmpeg the project supports GPU decoding via NVDEC, DXVA2, VAAPI, etc. However, the FFmpeg build that ships inside opencv-python (the pip wheel) is a fixed, pre-compiled build. That build is chosen for maximum compatibility and does not include CUDA/NVDEC. So when you use cv2.VideoCapture(rtsp_url), OpenCV calls that CPU-only FFmpeg decoder. To get GPU decoding in a Python/OpenCV workflow without changing your code, you need either a custom OpenCV build with GStreamer + NVDEC (as in this guide) or a separate pipeline that feeds GPU-decoded frames into Python (e.g. FFmpeg subprocess with GPU decode writing to a pipe or shared memory).
Scenario A: The CPU Killer (Standard OpenCV + FFmpeg)
When you feed a 12MP H.265 stream into a standard OpenCV VideoCapture, the CPU-only FFmpeg decoder desperately tries to solve the heavy H.265 mathematical puzzles to output 900 MB/s of raw pixel data.
- CPU Usage: Spikes to 95% - 100% (All cores maxed out).
- GPU Usage: 0% - 5% (Sitting idle, waiting for decoded frames).
- The Result: The CPU chokes. It processes maybe 5-8 FPS instead of 25. The unread frames pile up in the network buffer. Within minutes, your "live" stream is delayed by 2 to 3 minutes. Eventually, it drops packets, causing green smearing (macroblocking), and your Python script freezes.
Scenario B: The Hardware-Accelerated Savior (GStreamer + NVDEC)
We must bypass the FFmpeg CPU bottleneck entirely. NVIDIA GPUs have a dedicated silicon chip called NVDEC (NVIDIA Decoder) specifically built to decode H.264 and H.265 streams at lightning speed without touching the CUDA cores or the CPU.
By compiling OpenCV from source with GStreamer and utilizing the nvh265dec (or nvh264dec) plugin, we route the RTSP stream directly into the GPU.
- CPU Usage: Drops to 2% - 5%.
- GPU NVDEC Usage: ~15% - 20% active decoding.
- The Result: A locked, perfectly stable 25/30 FPS with 0.0ms latency. The CPU is completely free to run your Python logic, and the CUDA cores are free to run your heavy AI models.
For high-resolution RTSP in Python with zero-latency and GPU decoding, GStreamer + OpenCV (with NVDEC plugins) is the practical choice. FFmpeg remains the go-to for transcoding, probing, and general-purpose streaming outside of the OpenCV/Python decode path.
3. Compiling OpenCV with GStreamer (The Hard Part)
To unlock NVDEC, we must build OpenCV from source. Most industrial setups fail here, especially if the server is offline or behind a strict corporate firewall.
Prerequisites
- Visual Studio 2022 Build Tools: Ensure the "Desktop development with C++" workload is installed. Download (older releases).
- CMake: Install the Windows x64 version and add it to your system PATH. Download CMake.
- GStreamer (MSVC 64-bit): Download the MSVC installer from the official GStreamer website. (Older installers were split into runtime and development packages; current installers are unified, so a single package is sufficient.)
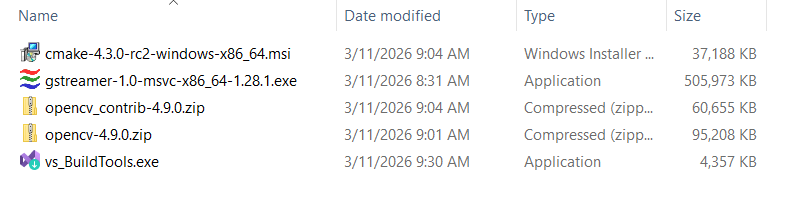
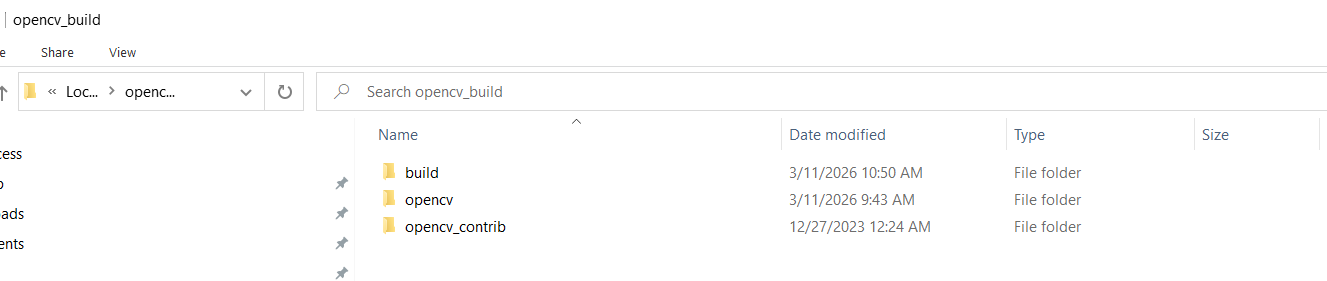
- OpenCV & OpenCV-Contrib Source: Download matching source codes (e.g., version 4.9.0). OpenCV releases · OpenCV-Contrib. Extract both archives into
C:/opencv_buildso that the OpenCV source lives atC:/opencv_build/opencv(orC:/opencv_build/opencv-4.9.0) and OpenCV-Contrib atC:/opencv_build/opencv_contrib. This is the folder CMake will use for the build.
CMake Configuration & The Offline Server Fix
- Open CMake (cmake-gui). Set Where is the source code to your OpenCV source folder under
C:/opencv_build(e.g.C:/opencv_build/opencv). Set Where to build the binaries toC:/opencv_build/build.
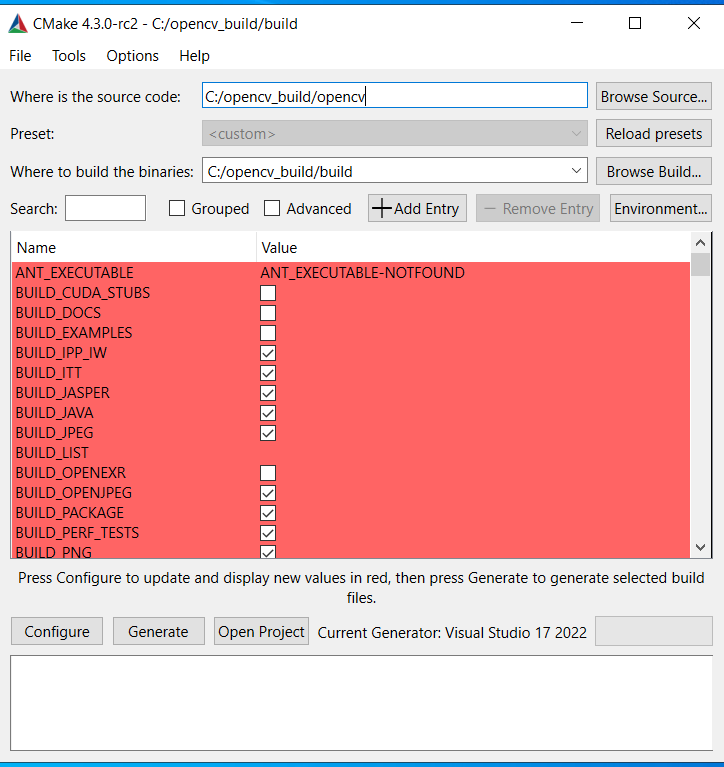
- Click Configure, select your VS 2022 x64 generator.
- Search and modify these specific flags:
- Check
WITH_GSTREAMER - Check
BUILD_opencv_world(Compiles everything into a single.dllto prevent DLL Hell). - Set
OPENCV_EXTRA_MODULES_PATHtoC:/opencv_build/opencv_contrib/modules.
⚠️ Crucial Corporate/Offline Server Fix: If your server lacks internet, CMake will fail to download weights for 3rd-party modules (like VGG or Face landmarks), causing fatal LNK2001 (Unresolved External Symbol) errors during the build.
Search for and DISABLE these modules:
BUILD_opencv_xfeatures2dBUILD_opencv_wechat_qrcodeBUILD_opencv_face
Click Configure again. Ensure GStreamer: YES appears in the console, then click Generate.
Building the Engine
Open the "Developer Command Prompt for VS 2022", navigate to C:/opencv_build/build, and compile:
cd C:\opencv_build\build
cmake --build . --config Release --target ALL_BUILD -j 16
4. The Python "DLL Hell" Fix
Since Python 3.8+, Windows Python no longer loads DLLs from the System PATH for security reasons. If you copy your newly built cv2.pyd into site-packages and run import cv2, you will get an ImportError: DLL load failed.
The Solution:
Put your compiled cv2.pyd file in your Python site-packages folder, and create a new file named sitecustomize.py next to it.
# sitecustomize.py
import os

try:
    # Explicitly expose GStreamer and compiled OpenCV DLLs to Python
    os.add_dll_directory(r"C:\gstreamer\1.0\msvc_x86_64\bin")
    os.add_dll_directory(r"C:\opencv_build\build\bin\Release")
except Exception:
    pass
5. The Ultimate Architecture: Grab/Retrieve & Dual-Stream
Even with hardware decoding, calling ret, frame = cap.read() inside a Python while loop allocates a 36MB NumPy array 25 times a second. This memory allocation overhead will eventually choke the Python interpreter (Buffer Bloat).
To solve this, we use the Dual-Stream Architecture combined with the Grab & Retrieve pattern.
- The Sub Stream (The Watchdog): A lightweight stream (e.g., 720p) runs at 30 FPS. We feed this into our AI model for fast, real-time object tracking.
- The Main Stream (The Sniper): The 12MP stream runs silently in a background thread using
cap.grab(). This instantly clears the C++ network buffer without decoding frames into Python RAM. - The On-Demand Trigger: When the AI on the Sub Stream detects the object crossing a trigger line, it commands the Main Stream to call
cap.retrieve(). For the first time, a single, perfectly crisp 12MP frame is decoded precisely when needed.
The Production-Ready Code
import cv2
import threading
import time

def create_pipeline(url, codec="h265"):
    # Select the correct hardware decoder based on your camera's codec
    decoder = "nvh265dec" if codec == "h265" else "nvh264dec"
    depay = "rtph265depay ! h265parse" if codec == "h265" else "rtph264depay ! h264parse"

    return (
        f"rtspsrc location={url} protocols=tcp latency=50 ! "
        f"{depay} ! {decoder} ! "
        "queue max-size-buffers=1 leaky=downstream ! "
        "videoconvert ! video/x-raw, format=BGR ! appsink drop=true sync=false max-buffers=1"
    )

class GStreamerMainStream:
    def __init__(self, pipe_str):
        self.cap = cv2.VideoCapture(pipe_str, cv2.CAP_GSTREAMER)
        self.running = True
        self.capture_request = False
        self.captured_frame = None
        self.capture_event = threading.Event()
        threading.Thread(target=self._reader_loop, daemon=True).start()

    def _reader_loop(self):
        while self.running:
            # FAST GRAB: Clears the GStreamer buffer instantly. 0 RAM overhead.
            ret = self.cap.grab()

            # Retrieve into a heavy NumPy array ONLY when explicitly requested
            if ret and self.capture_request:
                ret_ret, frame = self.cap.retrieve()
                if ret_ret:
                    self.captured_frame = frame
                self.capture_request = False
                self.capture_event.set()

    def take_snapshot(self):
        self.capture_event.clear()
        self.capture_request = True
        if self.capture_event.wait(timeout=2.0):
            return True, self.captured_frame.copy()
        return False, None

    def stop(self):
        self.running = False
        self.cap.release()

# --- Example Industrial Usage ---
if __name__ == "__main__":
    RTSP_MAIN = "rtsp://admin:pass@10.0.0.1:554/ch1/main" # 12MP (Inspection)
    RTSP_SUB = "rtsp://admin:pass@10.0.0.1:554/ch1/sub"   # 720p (Tracking)

    main_stream = GStreamerMainStream(create_pipeline(RTSP_MAIN, "h265"))
    sub_stream = cv2.VideoCapture(create_pipeline(RTSP_SUB, "h264"), cv2.CAP_GSTREAMER)

    print("System active. Monitoring sub-stream for targets...")

    try:
        while True:
            ret, frame_sub = sub_stream.read()
            if not ret: continue

            # Run your lightweight AI object tracking here...
            trigger_condition_met = False # Logic: Object crossed the line

            if trigger_condition_met:
                print("[TRIGGER] Target in position! Fetching 12MP frame...")

                # Instantly fetch the zero-latency 12MP frame from the background thread
                ret_main, frame_12mp = main_stream.take_snapshot()

                if ret_main:
                    cv2.imwrite("high_precision_capture.jpg", frame_12mp)
                    print("12MP Frame saved successfully! Ready for heavy inspection.")

    finally:
        main_stream.stop()
        sub_stream.release()
Conclusion
Handling 4K/12MP RTSP streams is not about throwing a more expensive CPU at the problem; it is about controlling the memory flow. By understanding video codecs like FFmpeg, offloading H.265/H.264 decoding to the NVDEC chip via GStreamer, solving offline compilation quirks, and structuring your Python code with a Dual-Stream Grab/Retrieve architecture, you can transform a crashing, lagging script into a robust, zero-latency industrial sensor.